📋 Before You Start
To install Windows on an OVH VPS, you need:
- OVH Cloud account with VPS management access.
- Rescue mode enabled and temporary root password generated.
- An active plan in your Windows VPS Installer account.
Windows Installation Steps on OVH VPS
1
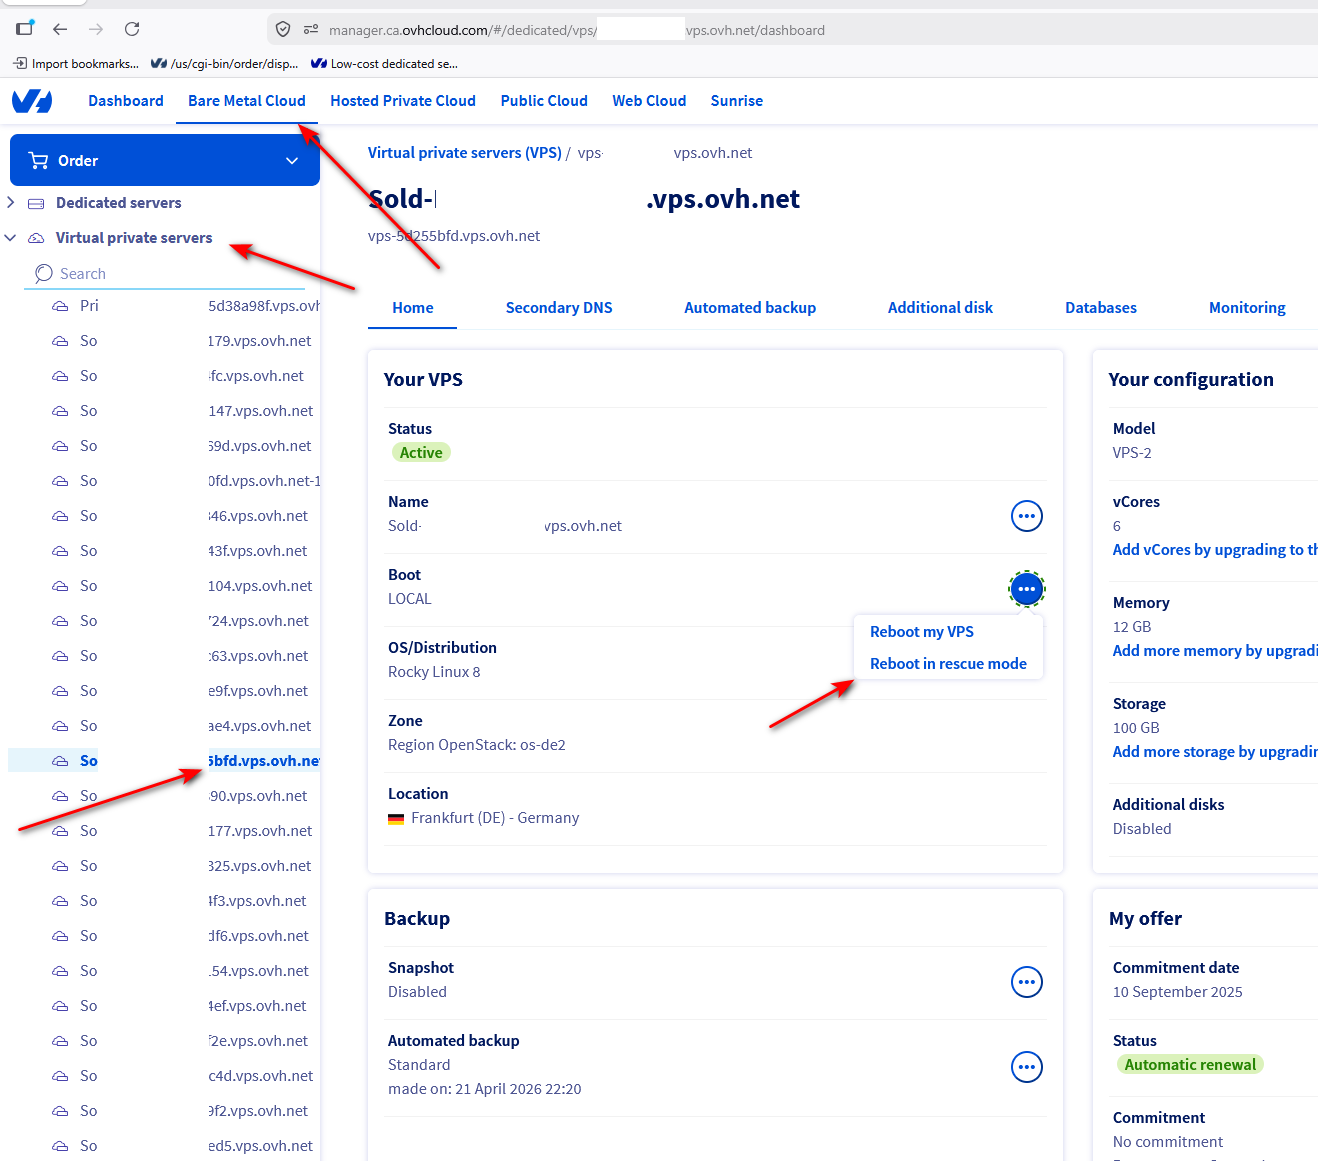
Open OVH Cloud and enable Rescue Mode
Select your VPS in OVH panel, then reboot into rescue mode to obtain temporary root credentials.
2
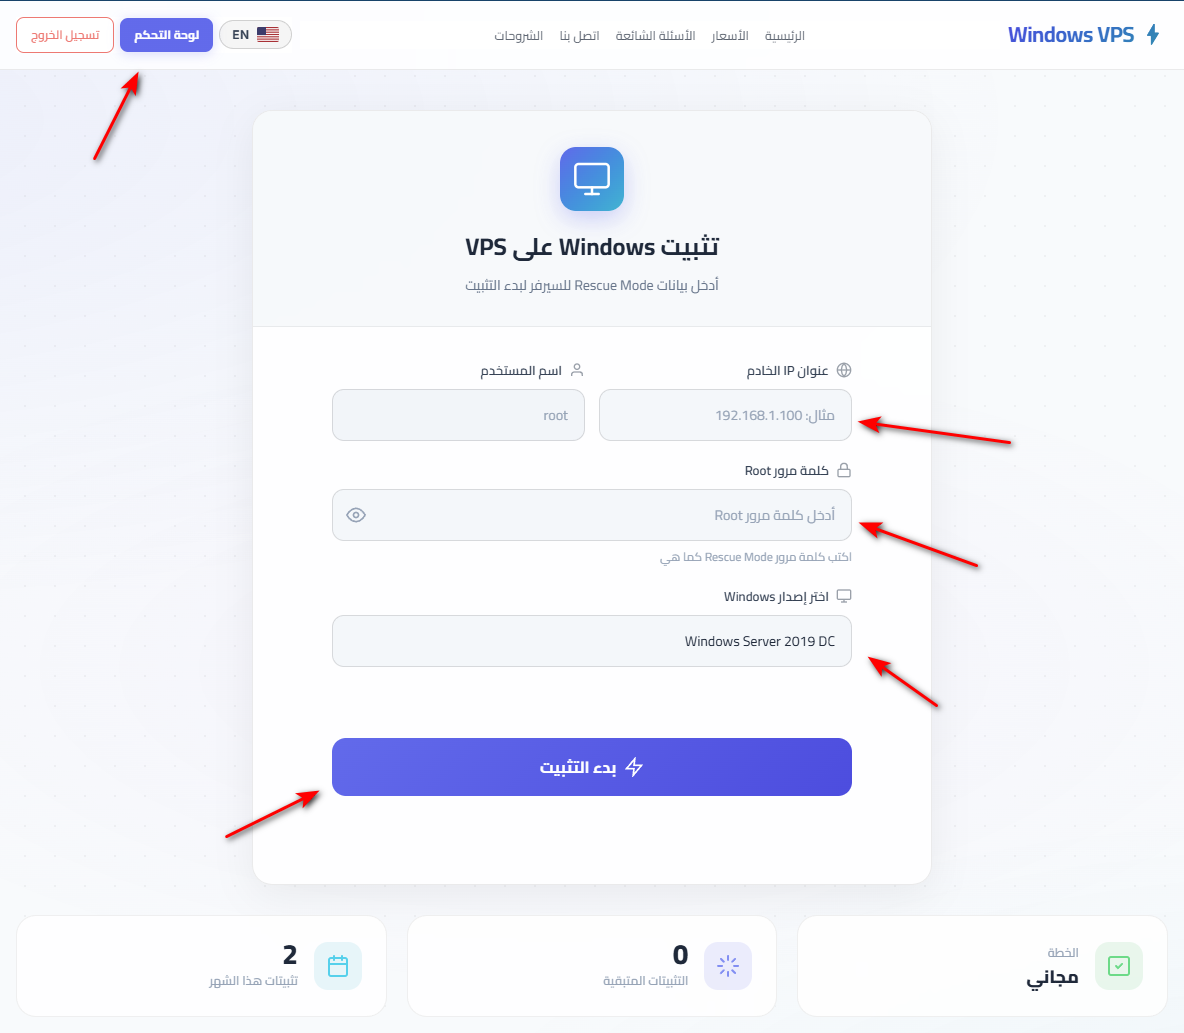
Enter Rescue credentials in installation form
In our dashboard, fill server IP + root + rescue password, then choose your Windows version.
3
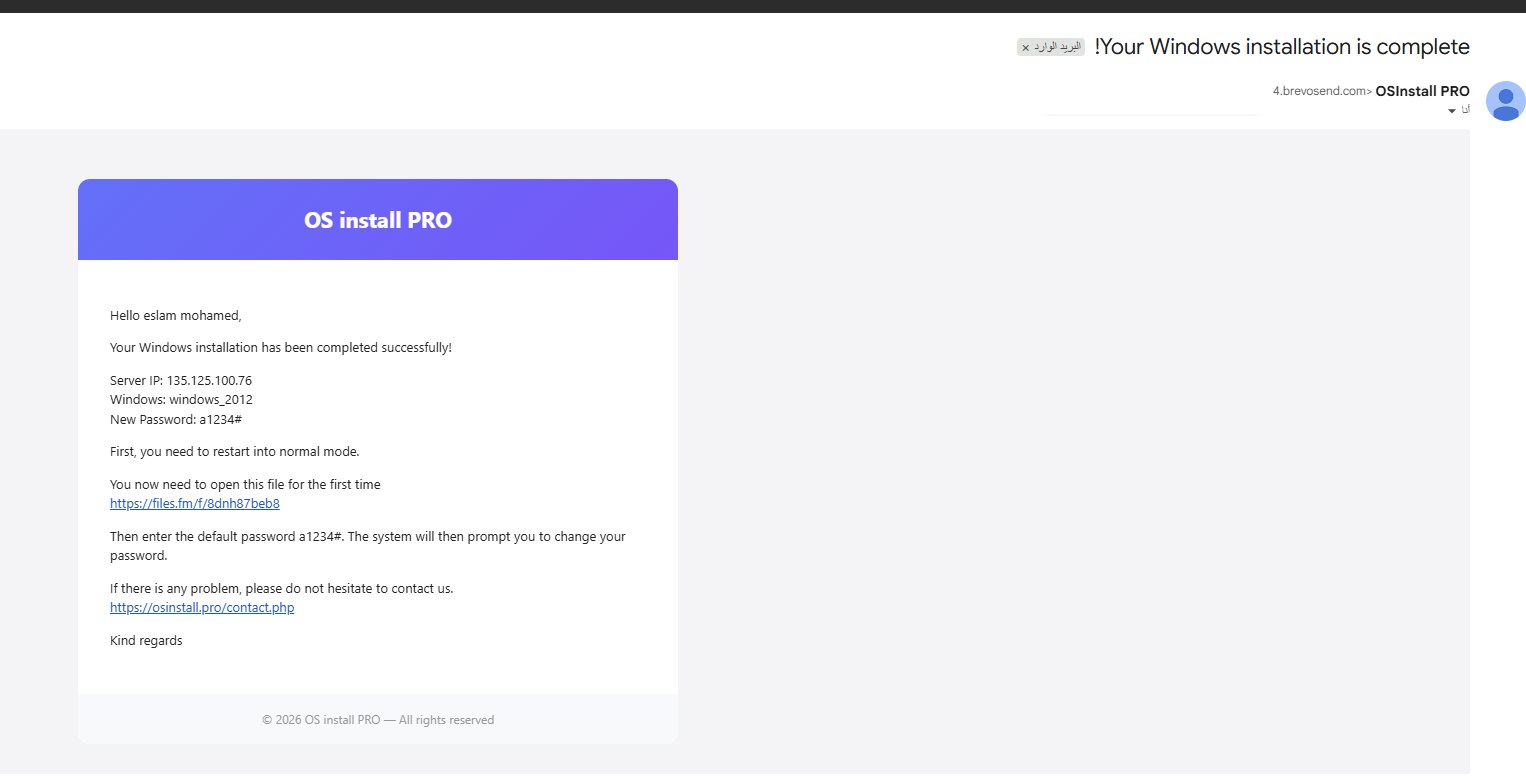
Wait for completion email
After successful installation you will receive an email with final credentials and RDP instructions.
📩 Post-Installation Instructions:
- First, perform a reboot through the OVH/Hetzner Panel to return to normal mode.
- Ignore this step if you use Android or iOS app.
- You now need to open this file for the first time:
https://files.fm/f/8dnh87beb8 - Then enter the default password
a1234#. The system will then prompt you to change your password. - Default username:
Administrator
If there is any problem, please do not hesitate to contact us:
https://osinstall.pro/contact.php
🔧 Important Notes
| Situation | Action |
|---|---|
| Connection failure | Confirm VPS is actually booted in rescue mode before install. |
| Password rejected | Re-enable rescue from OVH panel to generate a fresh password. |
| RDP delayed | Wait a few minutes after completion for Windows services startup. |